Equine dentistry has moved on significantly over the last five to ten years. Gone are the days where your vet or dentist turned up with a few handheld rasps and knocked the rough edges off the teeth, all whilst your horse took them on a tour round their box because they would really rather not have their teeth rasped!
So why have things changed?
Firstly our knowledge has improved. We now realise that our horses are incredibly good at hiding dental pain. They can have significant problems in their mouths including fractured teeth, painful diastemas and ulcerated gums and show no outwards signs of pain. There is now a well-known dental saying within the equine vet world, called ‘no pain check again’ because we know that, even if a horse isn’t displaying any signs of discomfort, it doesn’t mean that they don’t have dental problems.
Technology and therefore equipment has also moved on significantly and all good equine vets and Equine Dental Technicians (EDTs) should be using and/or have access to headstands, dental lights, mirrors, picks, diastema pumps, endoscopes and motorised rasps.
Having the correct kit allows us to identify early signs of problems before they become more serious.

A good example of this is our ability to identify and treat dental caries, which in human dentistry, is the equivalent to holes or decay within our teeth. If we can find these caries early, we can fill the hole, save the tooth and prevent it from fracturing in the future.
A fractured tooth in the upper part of your horse’s mouth will likely result in a sinus infection if left untreated. Sinus surgery is costly and a big operation for your horse so we want to try to prevent this happening in the first place.
So what does a proper dental examination look like nowhere days and importantly why do we do it?
Step 1 – History Taking
The first stage of the examination is to get a full history from the owner. Even if your horse hasn’t been showing signs of pain there may be other symptoms such as quidding (dropping balls of forage) when they are eating, halitosis (bad breath), dunking hay in water or nasal discharge down one nostril. You may have noticed subtle differences when you are riding such as being more one sided when schooling, not wanting to accept the contact in one rein, or go forwards off the leg.

Step 2 – To sedate or not?
The second part of the examination is to make sure the horse is extremely still, and this is where one of the biggest changes has come in…. to sedate or not?!
Always a contentious subject and one that is often hotly debated between horse owners because for years, dental rasps have been done without sedation. The difference now is that we understand how important it is to sedate which allows a thorough examination before we even get the rasps out.
Put really simply it is impossible to identify dental pathology in a moving mouth. Even if the head is still (ish) on the headstand, you can guarantee that the tongue will be moving. In order to do a thorough exam each individual tooth needs to be examined with a dental mirror and picks to look for changes to the tooth surface, caries, fractures and diastemas. A sedated and still mouth allows us to safely and thoroughly examine your horse.
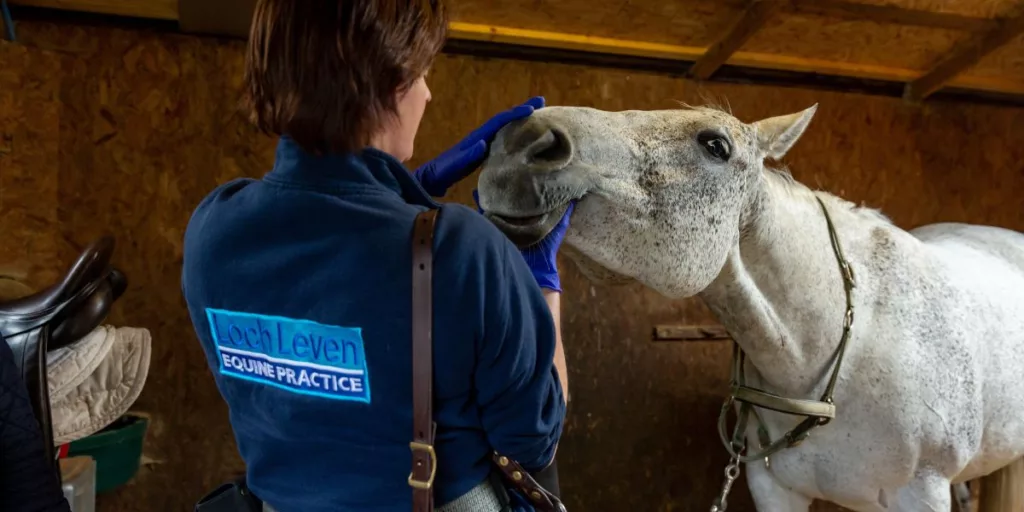
All of our vets now carry headstands in their vehicles which give us a stable and wide base to rest your horse’s head, so thankfully we no longer expect owners to hold up sleepy horses whilst they have their teeth examined! Another great step forwards!
Prior to sedating, the vet should also listen to their heart to check for abnormalities.
Step 3 – External examination
Before we put the gag on and look inside the mouth we need to examine the outside of your horse’s head. This involves looking at the facial symmetry for any abnormalities or swellings and the vet will palpate along the cheeks for any reactive areas and lumps and bumps.

Step 4 – Incisor examination
This part of the examination is performed without the gag on and the vets are looking at the appearance of the bite and whether they have a parrot mouth where the top incisor teeth overshoot the bottom incisors or a sow mouth which is the opposite with the lower incisors overshooting the top incisors. Poor incisor and jaw alignment can cause overgrowths – hooks and ramps to form further back in the mouth, so is something that needs careful management over time.
Step 5 – Cheek teeth examination
Only at this point should the gag be put on and the cheek teeth inside the mouth examined. The first stage is to flush out the mouth thoroughly to remove any food and debris to allow full visualisation. The next step is to count the teeth and make sure there aren’t any missing or extra teeth that may cause a problem. At this point the vet will examine each tooth checking for sharp points, fractures, ramps, hooks, diastemas and caries.

Diastemas are where food gets packed down in the gaps between the teeth. Because horses can’t floss or clean their own teeth this food starts rotting, causing pockets of infection and gum disease. They are incredibly painful for the horse so we need to be identifying them during our regular examination. Diastema pumps allow us to flush out the food using a high pressure stream of water and then we can look at how to treat the diseased gum and give it time to heal.
Caries can be identified using a mirror and dental picks. By examining and probing the surface of each tooth we can identify any signs of decay. Each tooth surface should be hard and firm so if the pick disappears into the tooth we know we have some decay. As more and more food packs into the hole and starts decaying the tooth dies off and will eventually fracture. The vet will grade the caries from a grade 1 which can be monitored to a grade 4 which will usually result in the tooth being removed.

It is only usually at this point that the vet will start to perform the dental rasping or treat any diastemas. Keep an eye out on our Watch with EquiTeam for a video on how we rasp teeth… coming very soon!
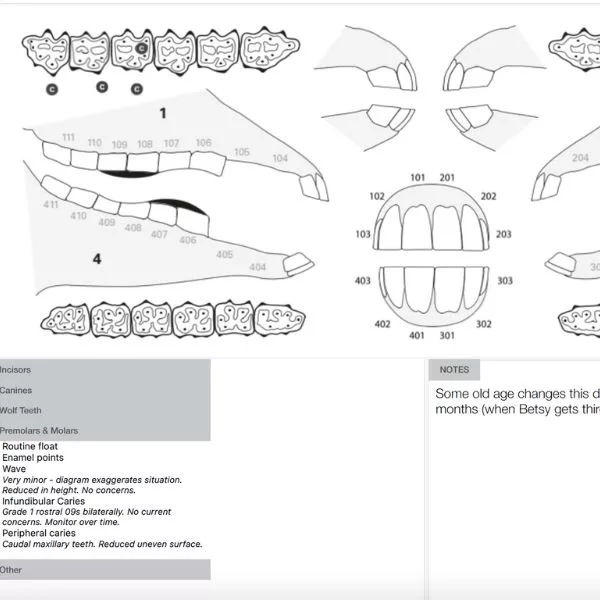
Step 6 – Dental Charts
The final part of the examination should involve you receiving a dental chart, either written or electronic. This will lay out on a chart what the vet found and what treatment was needed. The vet should also include when they would like to see your horse again. If it was a straightforward examination and rasp, then most horses only need to be seen every 12 months. Some horses need checking every six months and some with more complicated problems may need to be seen every more frequently.
If you have your horse insured and need to make a claim you will probably be asked for a copy as proof that you have been providing your horse with regular dental treatment, even if your claim is completely unrelated to a dental problem – make sure you keep them somewhere safe!
So as you can see equine dentistry has come on a very long way!
Regular and thorough dental examinations mean we can really make a difference to our horses’ mouths and their quality of life – you know what it’s like if you have toothache yourself – it’s the same for our horses but without the ability to be able to tell you.
If you only take two things away from this blog please remember #nopaincheckagain and… sedation is required for your vet or dentist to do their job properly!
You can get in touch with the team at Loch Leven Equine Practice by calling 01577 841010 or following them on Facebook